Group work rooms only staff can book
The staff of the University of Turku can book two library group work rooms by e-mail:
- KH253 Fröbel (Educarium Library)
- KH272 Montessori (Educarium Library)
The reservation is made via Outlook calendar (does not work with Chrome browser).
Other than members of staff cannot book these rooms.
The group work rooms can be booked for two hours at a time and are only available during library opening hours.
Library's all other bookable facilities and equipment are booked via the Asio-reservation system (see instructions).
When you reserve a room or a device your name and the heading of your reservation is visible to other Outlook users and on the room reservation displays.
If you don't want your information visible, please ask library customer service to make the reservation for you without your name visible.
This guide instructs you how to make reservations in OutlookWebApp (2013 version), i.e. in the web version of Outlook (https://mail.utu.fi).
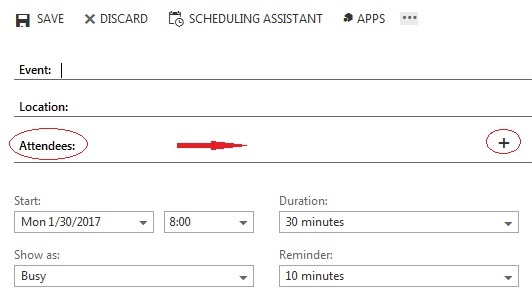
1. Start by opening the Webmail calendar.

2. 2. From the upper left corner, choose "New event". You can also choose time and name for your reservation.

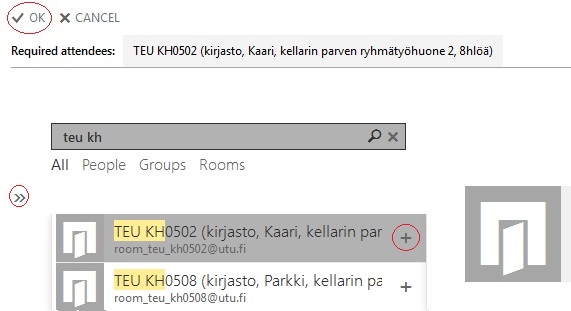
3. You should search for rooms or devices by adding them as attendees. The "Add room"-function will only show some of the rooms and devices you can reserve, meaning those which have not yet been reserved. You can add attendees from the +-sign on the right hand side.
4. Add the attendees and press "OK" to return to the previous menu. You can see different room options with the arrows on the left (>>).
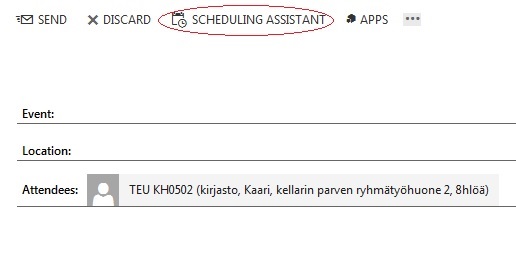
5. After this, choose "Scheduling assistant" to see what rooms are available. Scheduling assistant doen't work for equipment, only rooms.
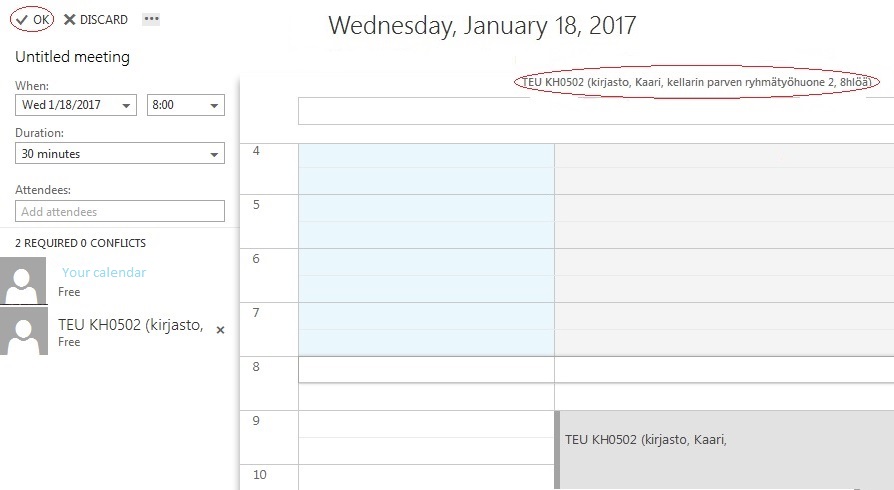
6. Now you can see the status of the rooms you have chosen. You can still change the time of your reservation and after you find a suitable slot, remove rooms you do not need from the attendees and press "OK" to return to previous menu.
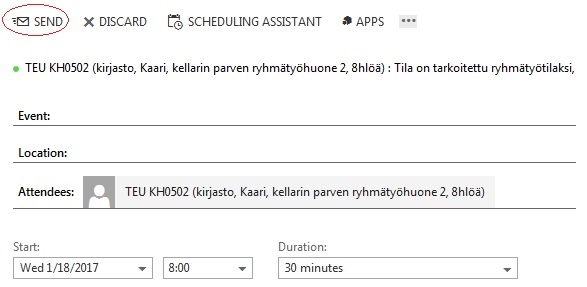
7. Press "Send" to make a reservation. You will get a notification to your email for your reservation. Remember to also read the notification.
8. You can cancel your reservation by right-clicking on it on your calendar.
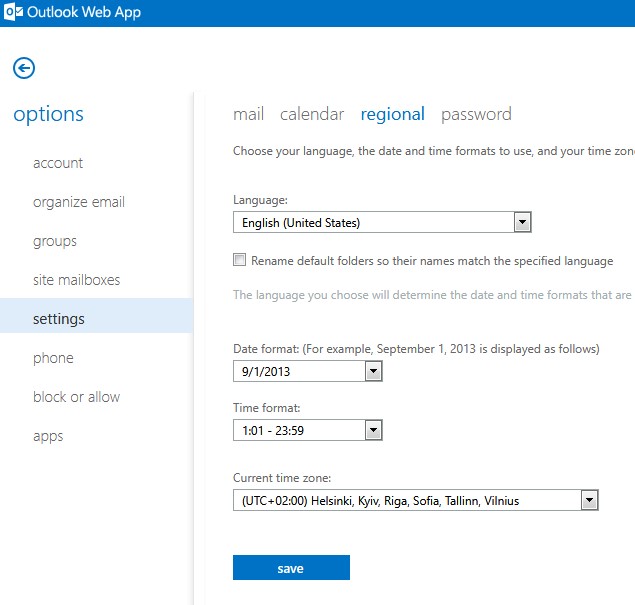
9. Time zone
Please note that you have to have the correct time zone in Outlook for reservations to work. You can change the time zone from the Web Outlook "Options" menu (Gear symbol in the top right corner).
This guide instructs you how to make reservations in OutlookWebApp (2010 version), i.e. in the web version of Outlook (https://mail.utu.fi).
When you reserve a room or a device your name and the heading of your reservation is visible to other Outlook users and on the room reservation displays. If you don't want your information visible, please ask library customer service to make the reservation for you without your name visible.
1. Click new meeting request.

2. Select the time and date and fill in a possible subject for your meeting.

3. Click resources.

4. Click rooms. You can browse all rooms alphabetically or write, for example, Edu on the search box. If you are reserving a device, for example a scanner, expand the list and choose "all equipment".

5. Select the amount of rooms you need by double clicking (for example in Educarium group work rooms 1-8) ja click OK.


6. Click scheduling assistant, which shows you the possible times available.

7. Remove the tick from in front of the other rooms than the one you have selected.

8. You will receive an email confirmation about your reservation.
9. If you want to cancel your reservation, you can do so by double clicking the reservation on your calendar. After that, click the Cancel meeting icon resembling the table on the picture below. Finally click the Send icon on the left top corner.

10. Time zone
Please note that you have to have the correct time zone in Outlook for reservations to work. You can change the time zone from the Web Outlook "Options" menu (Gear symbol in the top right corner) :

Further information on the reservation of the premises can be found on the intranet pages of the IT Services (only with utu user-id).
If you are a university staff and you do not have a UTU user id, you can make reservations by contacting the library’s customer services.